This article appeared in Electronic Design and has been published here with permission.
What you’ll learn
- Why is calibration important?
- How calibration techniques have changed over time.
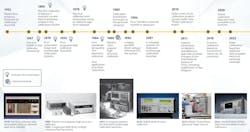
A timeline showing the evolution of calibration from the beginning would have to start hundreds of years ago (Fig. 1). The science of measurement has progressed from the earliest uses of the human body as reference measurements, like the cubit in early Egypt, to a sun dial to measure the passage of time, to our modern calibration tools. As trading developed, so did the need for accurate measurements. And as international trade and industry became the global standard, so did a critical need for precise measurements.
Precise Moments in Calibration History
Since the signing of the Metre Convention on May 20, 1875, creating the Bureau international des poids et mesures (BIPM), the world recognized a need for standard measurements.
In the 1950s, products designed for digital calibration began hitting the market. Fluke launched into the calibration space with the 301 Series Universal Waveform Generator in 1952. This waveform generator allowed technicians to calibrate the digital meters that had recently become popular.
In 1960, the global need for standardized measurements led to the creation of the International System of Units (SI), further strengthening the standards for measuring everything in our lives.
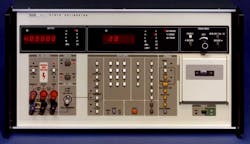
For the next couple decades after the SI establishment, the calibration industry would see quite a few firsts hit the market (Fig. 2). Each new first offered advancement toward further consistency and reliability of measurement. No matter what lab was using these instruments, they allowed users to realize better and better measurements over the years.
A huge component of the calibration workflow is consistency. With so many different methods of calibrating and checking measurements against the SI, every lab, and every technician within that lab may have a slightly different way of doing things.
However, that began to change in the late 1980s, as calibration automation started to rise (Fig. 3). MET/CAL Software allowed even further levels of consistency along with improved speeds. Knowing that the measurements and calibrations are performed in exactly the same way every time, no matter who’s doing the work, is of paramount importance to reducing measurement uncertainty.
As you continue through the decades, our ability to measure precisely continued to improve. New products hit the market, allowing technicians to repeat the same steps and measurements in any lab to get closer and closer to the standards set forth in the SI.
Which brings us to the other reason behind both the BIPM and SI existence: to have a system of measurement that was available to everyone. Originally, this proved to be difficult as the standards created were physical items often kept under lock and key to preserve them.
However, in 2018, those standards saw the biggest change of all: adjusting their definitions to refer to constants of nature instead of physical standards. With this change, the level of uncertainty we just had to live with due to the physical artifacts is eliminated. Laboratories and manufacturing facilities around the world can have access to the highest levels of measurement capabilities with these new constants, which further enables more technological evolution.
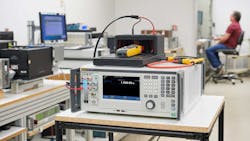
Taking these standards into account, and our constant trek toward greater precision, Fluke Calibration launched the newest multi-product calibrators in 2022. The 5560A/5550A/5540A High Performance Multi-Product Calibrators (Fig. 4) offer broad electrical workload coverage and the highest accuracy available thus far in this class of instruments, according to the company. The new calibrator features a handful of industry firsts:
- Fuse-free design
- Reverse power protection, preventing costly operator errors
- 4:1 test TUR for calibrating 6.5-digit multimeters
- 30-A continuous current output, extending ac-dc measurement ranges
The Future of Measurement Sciences
We’re not done evolving how we measure the world. With the recent changes to the SI, its original goal has been realized: a standardized measurement system that’s accessible for anyone. However, each metrology discipline will continue to evolve in their own way given the technology available at the time.
Also on the horizon are digital calibration certificates that would enable customers to export data into other organizational systems for convenient trending and analysis. There’s much more being done in the digital arena, and Fluke Calibration along with other global partners will play vital roles in setting and executing on the coming standards.
Over the years, we’ve already seen this evolution in our everyday lives; for example, having smaller electronics that allow for more power in the palm of your hand than ever before. Without the evolution of calibration and the constant push toward better measurement accuracy, those advances, and future advances, would not be possible.


